
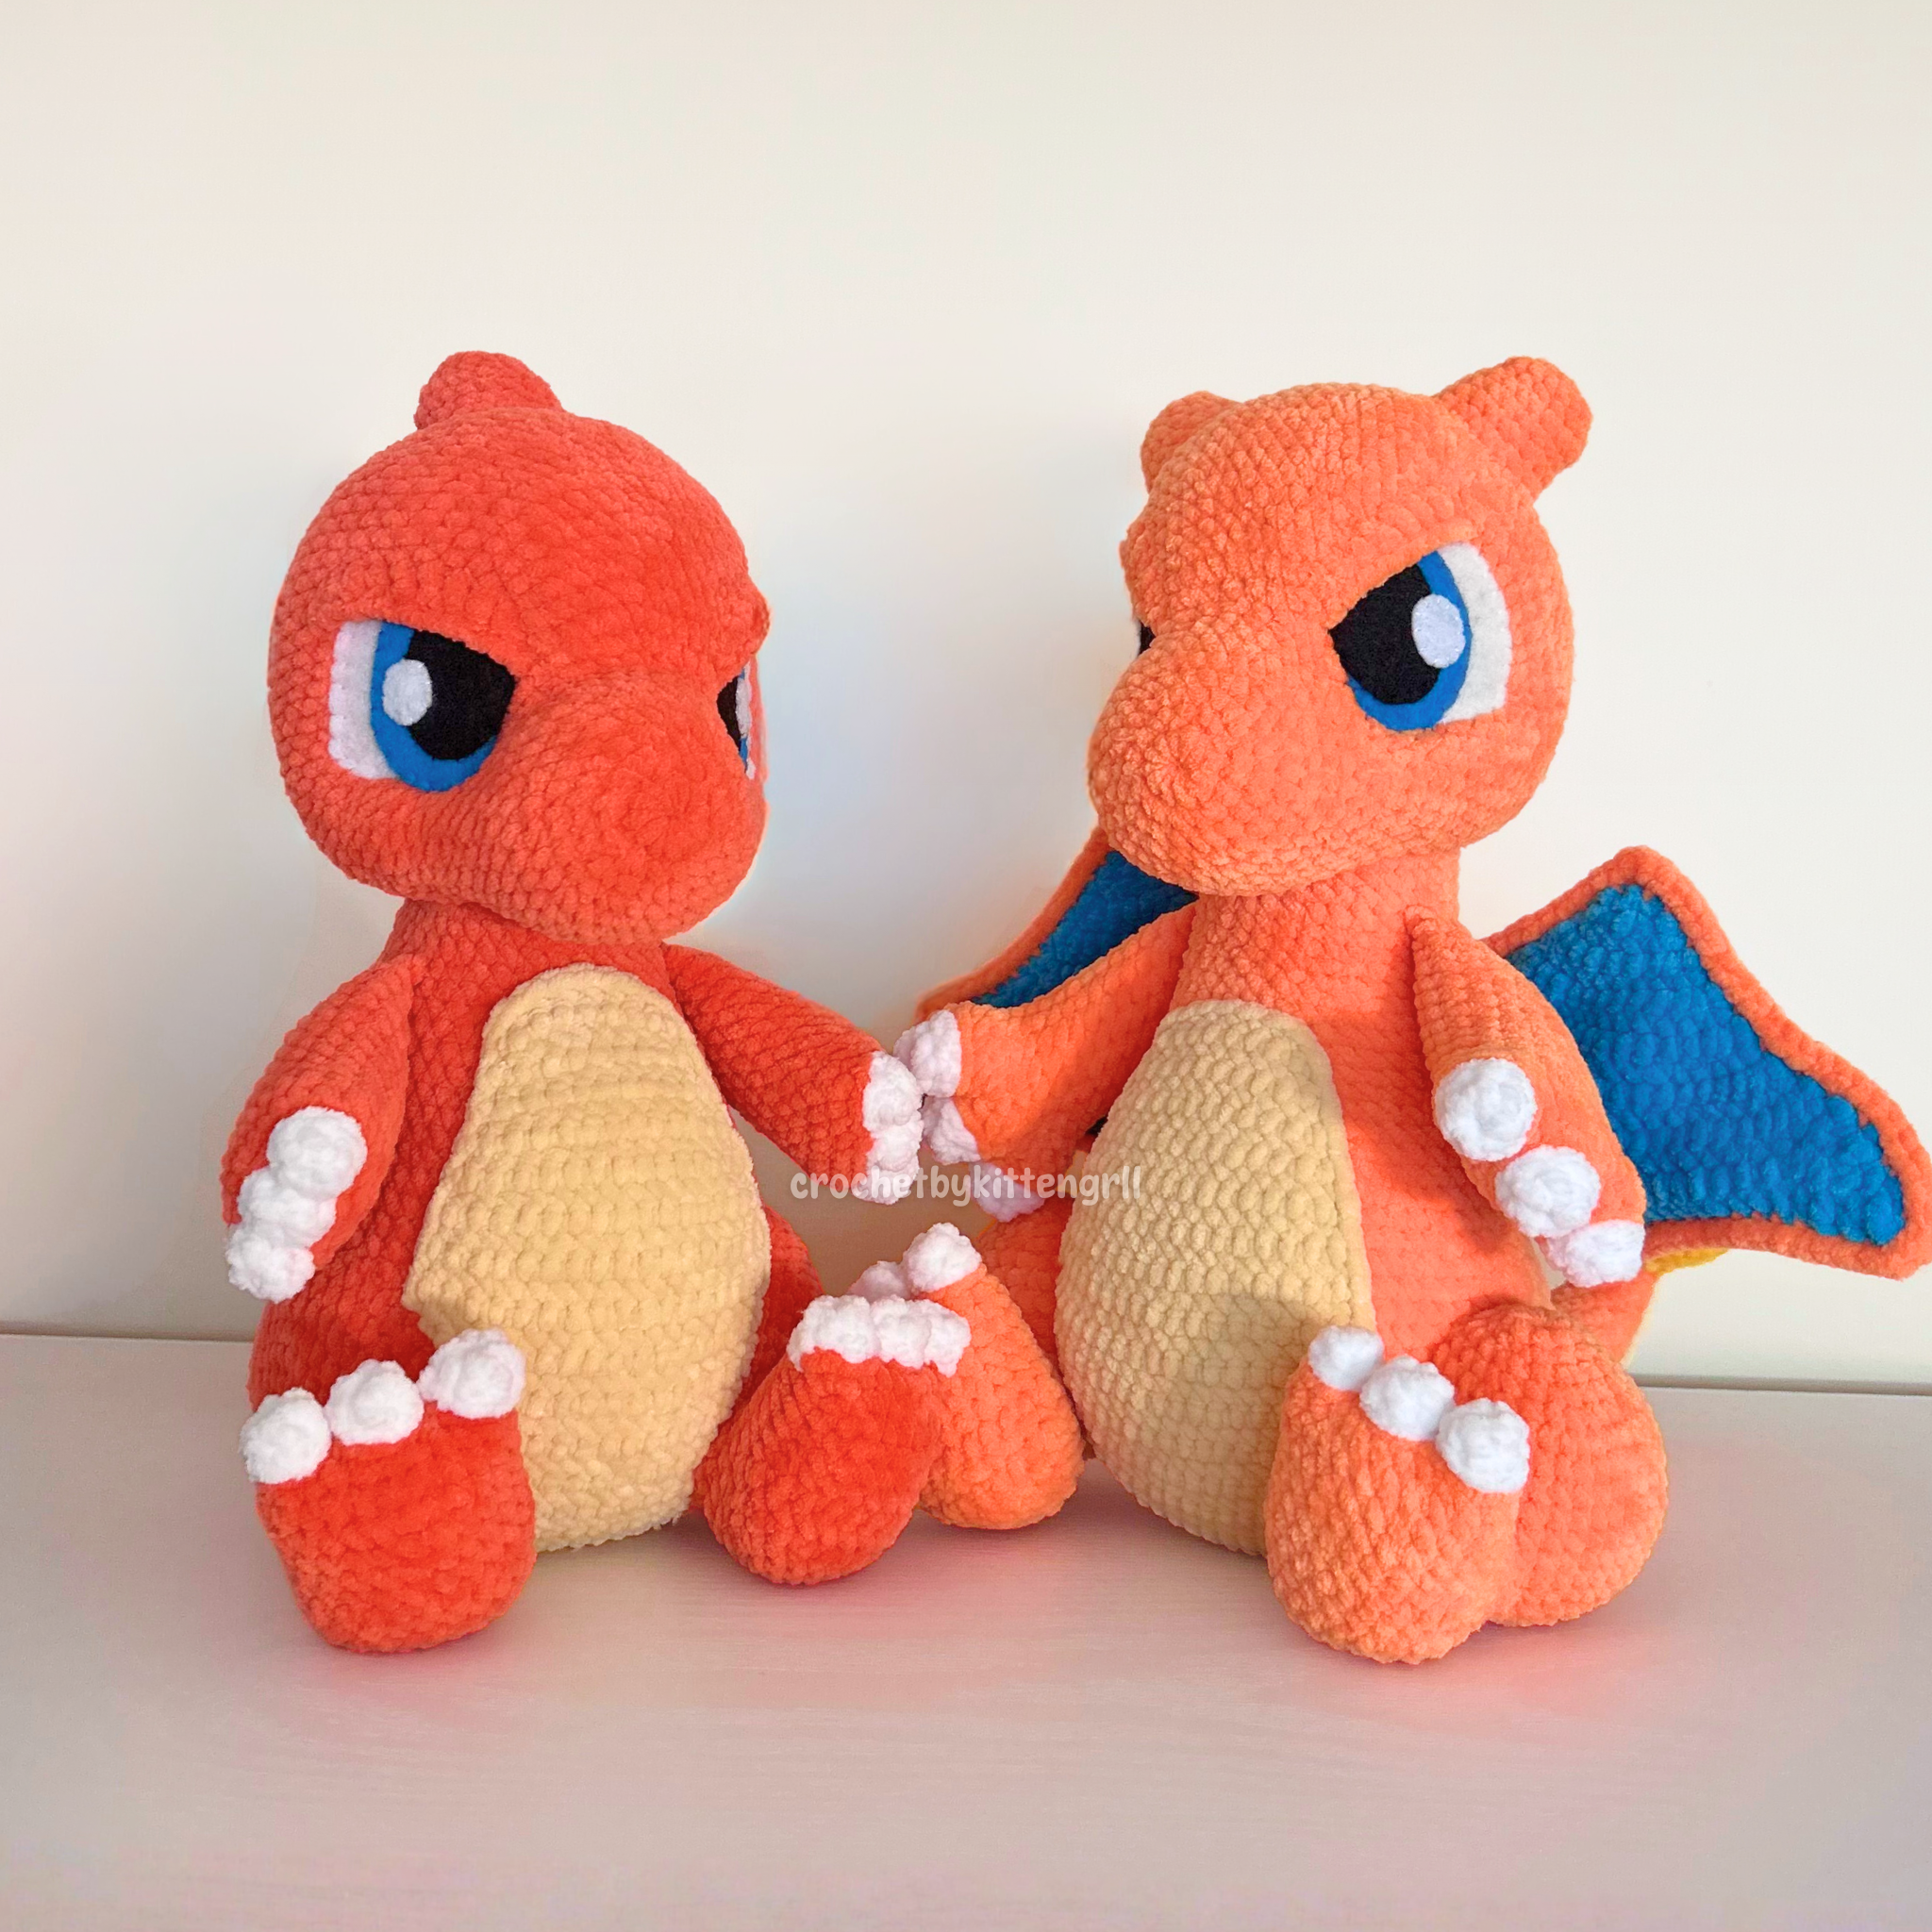
Charmeleon/Charizard
Crochet Pattern
IMPORTANT
This pattern is property of @crochetbykittengrll. You may not alter, copy, sell, or redistribute this pattern or any part of it.
If you decide to post any photos of your creations made with this pattern, I would love for you to tag me (@crochetbykittengrll on TikTok/Instagram/Pinterest/YouTube) so I can see and share!
Notes
This pattern is in US terminology only.
I use the yarn under/yarn over method, but you may use whichever method you prefer. Keep in mind different crocheting methods may alter the way your plushie turns out.
All decreases in this pattern use the invisible decrease method because the regular decrease may leave larger gaps in your work. I highly recommend using the invisible decrease method.
If you’re having trouble closing your magic ring for ‘Round 1: mr sc 12,’ try the chain 2 method instead!
The pictures in this pattern don’t represent the yarn colors listed in the ‘materials’ section because I was making the shiny versions in the instructional photos.
Materials
Yarn (Charmeleon)
Color A: Parfait Chunky (Super Bulky 6) in color ‘Mango’ - 2 skeins
Color B: Parfait Chunky (Super Bulky 6) in color ‘Poppy’ - 1 skein
Color C: Parfait Chunky (Super Bulky 6) in color ‘Summer Squash’ - 1 skein
Color D: Parfait Chunky (Super Bulky 6) in color ‘Mashed Potatoes’ - 1 skein (LIMITED EDITION)
You can opt for the color ‘Yellow’ as a replacement due to unavailability.
Color E: Parfait Chunky (Super Bulky 6) in color ‘White’ - 1 skein
Worsted Weight in a similar color to Color A
Yarn (Charizard)
Color A: Parfait Chunky (Super Bulky 6) in color ‘Tangerine’ - 3 skeins
Color B: Parfait Chunky (Super Bulky 6) in color ‘Mango’ - 1 skein
Color C: Parfait Chunky (Super Bulky 6) in color ‘Summer Squash’ - 1 skein
Color D: Parfait Chunky (Super Bulky 6) in color ‘Mashed Potatoes’ - 1 skein (LIMITED EDITION)
You can opt for the color ‘Yellow’ as a replacement due to unavailability.
Color E: Parfait Chunky (Super Bulky 6) in color ‘White’ - 1 skein
Color F: Honey Bunny (Super Bulky 6) in color ‘Capri Blue (90)’ - 1 skein
Worsted Weight in a similar color to Color A
Felt
Blue Felt
White Felt
Black Felt
(or you can purchase felt eye sewing kits HERE)
Embroidery Thread
Blue Embroidery Thread
White Embroidery Thread
Black Embroidery Thread
(or you can purchase felt eye sewing kits HERE)
Other
Embroidery Needle
Weaving/Yarn Needle
4mm Crochet Hook
Sewing Pins
Scissors
Stitch Markers
Fiberfil Stuffing
16 Gauge Craft Wire and Wire Cutters
Abbreviations
ch = chain
mr = magic ring
sc = single crochet
sc3inc = single crochet 3 increase
inc = single crochet increase
hdc = half double crochet
hdc-inc = half double crochet increase
dc = double crochet
dc-inc = double crochet increase
dc3inc = double crochet 3 increase
dec = invisible decrease
sc2tog = single crochet 2 together
FPSC = front post single crochet
rnd = round
slst = slip stitch
st(s) = stitch(es)
FLO = front loop only
BLO = back loop only
FO = fasten off
CC = change color
Head
Use Color A and crochet in continuous rounds.
Round 1: mr 12 (12)
Round 2: (sc, inc) x6 (18)
Round 3: sc, inc, (sc 2, inc) x5, sc (24)
Round 4: (sc 3, inc) x6 (30)
Round 5: sc 2, inc, (sc 4, inc) x5, sc 2 (36)
Round 6-8: sc around (36) 3 ROUNDS
Round 9: (sc, inc) x6, sc 24 (42)
Tip: Mark the outside of the first sc st and 6th inc st in rnd 9 to be able to help you find the center of the face in the future.

Round 10: sc, inc, (sc 2, inc) x5, sc 25 (48)
Round 11: (sc 3, inc) x6, sc 24 (54)
Round 12: sc around (54)
Round 13: sc 4, inc, (sc 8, inc) x5, sc 4 (60)
Round 14: sc around (60)
Round 15: (sc 5, inc) x6, sc 24 (66)
Round 16: sc around (66)
Round 17: (sc 10, inc) x6 (72)
Round 18: sc around (72)
Round 19: (sc 7, inc) x6, sc 24 (78)
Round 20-22: sc around (78) 3 ROUNDS
Round 23: (sc 11, dec) x6 (72)
Round 24: sc around (72)
Round 25: sc 5, dec, (sc 10, dec) x5, sc 5 (66)
Round 26: sc around (66)
Round 27: (sc 9, dec) x6 (60)
Round 28: sc around (60)
Round 29: sc 4, dec, (sc 8, dec) x5, sc 4 (54)
Round 30: (sc 7, dec) x6 (48)
Start stuffing the head and continue stuffing as you go.
Round 31: sc 3, dec, (sc 6, dec) x5, sc 3 (42)
Round 32: (sc 5, dec) x6 (36)
Round 33: sc 2, dec, (sc 4, dec) x5, sc 2 (30)
Round 34: (sc 3, dec) x6 (24)
Round 35: sc, dec, (sc 2, dec) x5, sc (18)
Round 36: (sc, dec) x6 (12)
Round 37: dec 6 (6)
FO and sew the opening closed. Tuck in/secure your yarn tail.
Eyelids
*Please Note: If you prefer to create your own felt eyes rather than purchasing pre-cut felt eye kits HERE, it will be up to you to cut them out at your own discretion. Due to this, these eyelids may not fit your Charmeleon/Charizard and you may need to modify them! They could be too small or too big depending on how small/big you made your eyes. I’d recommend skipping to step 1 of assembly to cut out the eyes before making these eyelids so you can modify accordingly.
To modify the eyelids to your ideal size, simply change the length of your starting chain. For example, if chaining 11 is too small for your eyes, chain 13 or however many sts you need to ensure the eyelids are the same length as your eye. From here, you can modify row 1 by adding additional dc’s in the middle of the row to match your number of sts (or you can remove the dc sts in the middle of the row if you’re making them smaller). This may take some trial and error, but this is unfortunately the nature of cutting out your own felt eyes - thankfully the eyelids are very simple and quick to make!
Use Color A and crochet in rows. Make 2.
Leaving a long starting tail, ch 11. Start row 1 in the 2nd ch from hook:
Row 1: slst, sc, hdc 2, dc 2, hdc 2, sc, slst (10)
FO, leaving a long tail to sew with.
Charmeleon’s Body
Use Color A and crochet in continuous rounds.
Round 1: mr sc 12 (12)
Round 2: (sc, inc) x6 (18)
Round 3: sc, inc, (sc 2, inc) x5, sc (24)
Round 4: (sc 3, inc) x6 (30)
Round 5: sc 2, inc, (sc 4, inc) x5, sc 2 (36)
Round 6: (sc 5, inc) x6 (42)
Round 7: sc 3, inc, (sc 6, inc) x5, sc 3 (48)
Round 8: (sc 7, inc) x6 (54)
Round 9: sc 4, inc, (sc 8, inc) x5, sc 4 (60)
Round 10-11: sc around (60) 2 ROUNDS
Round 12: (sc 4, inc) x6, sc 30 (66)
Round 13-15: sc around (66) 3 ROUNDS
Round 16: sc 2, dec, (sc 4, dec) x5, sc 32 (60)
Round 17-18: sc around (60) 2 ROUNDS
Round 19: (sc 3, dec) x6, sc 30 (54)
Round 20-22: sc around (54) 3 ROUNDS
Round 23: sc 24, (sc 3, dec) x6 (48)
Round 24-25: sc around (48) 2 ROUNDS
Round 26: sc 25, dec, (sc 2, dec) x5, sc (42)
Start stuffing and continue to stuff as you go.
Round 27-29: sc around (42) 3 ROUNDS
Round 30: sc 24, (sc, dec) x6 (36)
Round 31-36: sc around (36) 6 ROUNDS
Round 37: sc 24, dec 6 (30)
Make a slst and FO, leaving a long tail to sew with.
Charizard’s Body
Use Color A and crochet in continuous rounds.
Round 1: mr sc 12 (12)
Round 2: (sc, inc) x6 (18)
Round 3: sc, inc, (sc 2, inc) x5, sc (24)
Round 4: (sc 3, inc) x6 (30)
Round 5: sc 2, inc, (sc 4, inc) x5, sc 2 (36)
Round 6: (sc 5, inc) x6 (42)
Round 7: sc 3, inc, (sc 6, inc) x5, sc 3 (48)
Round 8: (sc 7, inc) x6 (54)
Round 9: sc 4, inc, (sc 8, inc) x5, sc 4 (60)
Round 10-11: sc around (60) 2 ROUNDS
Round 12: (sc 4, inc) x6, sc 30 (66)
Round 13-17: sc around (66) 5 ROUNDS
Round 18: sc 2, dec, (sc 4, dec) x5, sc 32 (60)
Round 19-20: sc around (60) 2 ROUNDS
Round 21: (sc 3, dec) x6, sc 30 (54)
Round 22-24: sc around (54) 3 ROUNDS
Round 25: sc 24, (sc 3, dec) x6 (48)
Round 26-28: sc around (48) 3 ROUNDS
Round 29: sc 25, dec, (sc 2, dec) x5, sc (42)
Start stuffing and continue stuffing as you go.
Round 30-33: sc around (42) 4 ROUNDS
Round 34: sc 24, (sc, dec) x6 (36)
Round 35-42: sc around (36) 8 ROUNDS
Make a slst and FO, leaving a long tail to sew with later.
Charmeleon’s Horn
Use Color A and crochet in continuous rounds.
Round 1: mr sc 8 (8)
Round 2: inc 8 (16)
Round 3: FPSC 16 (16)
Round 4: (sc, inc) x4, sc 8 (20)
Round 5: sc 12, dec 4 (16)
Round 6: (sc 2, inc) x4, sc 4 (20)
Make a slst and FO, leaving a long tail to sew with later.
Charizard’s Horns
Use Color A and crochet in continuous rounds. Make 2.
Round 1: mr sc 8 (8)
Round 2: inc 8 (16)
Round 3: FPSC 16 (16)
Round 4: (sc, inc) x4, sc 8 (20)
Round 5: sc 12, dec 4 (16)
Round 6: (sc 2, inc) x4, sc 4 (20)
Round 7: sc around (20)
Make a slst and FO, leaving a long tail to sew with later.
Toe 1 & 2
Use Color E and crochet in continuous rounds. Make 4.
Round 1: mr sc 6 (6)
Round 2: sc around (6)
FO, leaving a long tail to sew with later. Set these aside until you make it to the “feet” section.
Toe 3
Use Color E and crochet in continuous rounds. Make 2 (you’ll have to move onto the ‘feet’ section and complete the first foot before making the 2nd ‘toe 3’).
Round 1: mr sc 6 (6)
Round 2: sc around (6)
DO NOT FO - CC to Color A, and continue onto the ‘feet’ section below, where we will continue for rnd 3. Once you CC to Color A, you can cut and FO your strand of Color E.
Feet
Continue with the yarn strand from toe 3, and crochet in continuous rounds unless specified otherwise. Make 2.
Tip: (1) Don’t crochet over your yarn tails in Color E ~ we’ll use these to sew the gaps between the toes shut. (2) When you begin crocheting into toe 1 or 2, you can insert your hook into any st of rnd 2, but I like to insert mine into the first st of rnd 2.
Round 3: BLO: [slst 3 around toe 3], ch 1, BLO: [slst 3 around toe 2], ch 1, BLO: [slst 6 around toe 1], sc into ch, BLO: [slst 3 around toe 2], sc into ch, BLO: [slst 3 around toe 3] (22)
At this point, you’ll want to use your leftover yarn strands in Color E from the the toes to sew any gaps between the toes shut. Secure all excess yarn tails, and move onto rnd 4.
Round 4: BLO: [sc 3], sc into ch, BLO: [sc, inc, sc], sc into ch, BLO: [sc 8, inc, sc 5] (24)
Round 5-8: sc around (24) 4 ROUNDS
Tip: In rnd 9, we’ll pause crocheting in rounds and crochet in rows instead. We will NOT be utilizing a turning chain for these rows.
Round 9: sc 14, turn to crochet in rows temporarily:
Row 1: sc2tog, sc 12 (13)
Row 2: sc2tog, sc 11 (12)
Row 3: sc2tog, sc 10 (11)
Row 4: sc2tog, sc 9 (10)
Start crocheting in rounds again to continue rnd 9.
Round 9 (continued): sc 3 down the side of the rows, sc 10 (23)

Round 10: sc 3 up the side of the rows, sc 23 (26)

Round 11: (sc, dec) x6, sc 8 (20)
Start stuffing the foot and continue stuffing as you go.
Round 12: sc 4, dec, sc 8, dec, sc 4 (18)
Round 13: (sc, dec) x6 (12)
Round 14: dec 6 (6)

Sew the opening shut and FO. Follow the steps below to make the “legs.”

Charmeleon’s Arms
Step 1: Make Fingers 1 & 2
Use Color E and crochet in continuous rounds. Make 4.
Round 1: mr sc 6 (6)
Round 2: sc around (6)
FO, leaving a long tail to sew with later. Set these aside until you make it to step 3.
Step 2: Make Finger 3
Use Color E and crochet in continuous rounds. Make 2 (you’ll have to move onto step 3 and complete the first arm before making the 2nd ‘finger 3’).
Round 1: mr sc 6 (6)
Round 2: sc around (6)
DO NOT FO - CC to Color A, and continue onto step 3 below, where we will continue for rnd 3. Once you CC to Color A, you can cut and FO your strand of Color E.
Step 3: Make the Arms
Continue with the yarn strand from finger 3, and crochet in continuous rounds. Make 2.
Tip: (1) Don’t crochet over your yarn tails in Color E ~ we’ll use these to sew the gaps between the fingers shut. (2) When you begin crocheting into finger 1 or 2, you can insert your hook into any st on rnd 2, but I like to insert mine into the first st of rnd 2.
Round 3: BLO: [slst 3 around finger 3, slst 3 around finger 2, slst 6 around finger 1, slst 3 around finger 2, slst 3 around finger 3] (18)
At this point, you’ll want to use your leftover yarn strands in Color E from the fingers to sew any gaps between the fingers shut. Secure all excess yarn tails, and move onto rnd 4.
Round 4: BLO: [sc, inc, (sc 2, inc) x5, sc] (24)
Round 5: sc around (24)
Round 6: sc, dec, (sc 2, dec) x5, sc (18)
Round 7-15: sc around (18) 9 ROUNDS
Stuff the arms, but don’t overstuff. Make an additional 1-2 sc so that you can pinch the arm shut while ensuring it’s in-line with the fingers. Sc the arm shut with 9 sc sts. FO, leaving a long tail to sew with later.

Charizard’s Arms
Step 1: Make Fingers 1 & 2
Use Color E and crochet in continuous rounds. Make 4.
Round 1: mr sc 6 (6)
Round 2: (sc, inc) x3 (9)
CC to Color A.
Round 3: BLO: [slst around] (9)
FO, leaving a long tail to sew with later. Set these aside until you make it to step 3.
Step 2: Make Finger 3
Use Color E and crochet in continuous rounds. Make 2 (you’ll have to move onto step 3 and complete the first arm before making the 2nd ‘finger 3’).
Round 1: mr sc 6 (6)
Round 2: (sc, inc) x3 (9)
CC to Color A.
Round 3: BLO: [slst around] (9)
DO NOT FO - Continue onto step 3 below where we will continue for rnd 4.
Step 3: Make the Arms
Continue with the yarn strand from finger 3, and crochet in continuous rounds. Make 2.
Tip: (1) Don’t crochet over your yarn tails because we’ll use them to sew the gaps between the fingers shut. (2) When you begin crocheting into finger 1 or 2, you can insert your hook into any st on rnd 3, but I like to insert mine into the first st of rnd 3.
Round 4: BLO: [sc 4 around finger 3, sc 5 around finger 2, sc 9 around finger 1, sc 4 around finger 2, sc 5 around finger 3] (27)
At this point, you’ll want to use your leftover yarn strands from the fingers to sew any gaps between the fingers shut. Secure all excess yarn tails, and move onto rnd 4.
Round 5: sc around (27)
Round 6: (sc, dec) x9 (18)
Round 7-12: sc around (18) 6 ROUNDS
Start stuffing the arm, and stuff as you go. Don’t overstuff.
Round 13-18: sc around (18) 6 ROUNDS
Make an additional 1-2 sc so that you can pinch the arm shut while ensuring it’s in-line with the fingers. Sc the arm shut with 9 sc sts. FO, leaving a long tail to sew with later.

Charmeleon’s Thighs
Use Color A and crochet in continuous rounds. Make 2.
Round 1: mr sc 6 (6)
Round 2: inc 6 (12)
Round 3: (sc, inc) x6 (18)
Round 4: sc, inc, (sc 2, inc) x5, sc (24)
Round 5: (sc 3, inc) x6 (30)
Round 6: sc 2, inc, (sc 4, inc) x5, sc 2 (36)
Round 7-8: sc around (36) 2 ROUNDS
Make a slst and FO, leaving a long tail to sew with later.
Charizard’s Thighs
Use Color A and crochet in continuous rounds. Make 2.
Round 1: mr sc 8 (8)
Round 2: (sc, inc) x4 (12)
Round 3: (sc, inc) x6 (18)
Round 4: sc, inc, (sc 2, inc) x5, sc (24)
Round 5: (sc 3, inc) x6 (30)
Round 6: sc 2, inc, (sc 4, inc) x5, sc 2 (36)
Round 7-13: sc around (36) 7 ROUNDS
Round 14: sc 2, dec, (sc 4, dec) x5, sc 2 (30)
Round 15: (sc 3, dec) x6 (24)
Start stuffing and continue stuffing as you go. DO NOT overstuff - these pieces shouldn’t be firm.
Round 16: sc, dec, (sc 2, dec) x5, sc (18)
Round 17: (sc, dec) x6 (12)
Round 18: dec 6 (6)
Sew the opening shut and weave in the yarn tail.
Inner Wings (Charizard ONLY)
Use Color F and crochet in rows. Make 2. *To make the edges look cleaner, I do not utilize turning ch’s.
Row 1: mr sc 2, turn (2)
Row 2: inc 2, turn (4)
Row 3: sc, inc 2, sc, turn (6)
Row 4: sc, inc, sc 2, inc, sc, turn (8)
Row 5: sc, inc, sc 4, inc, sc, turn (10)
Row 6: sc, inc, sc 6, inc, sc, turn (12)
Row 7: sc, inc, sc 8, inc, sc, turn (14)
Row 8: sc, inc, sc 10, inc, sc, turn (16)
Row 9: sc, inc, sc 12, inc, sc, turn (18)
Row 10: sc, inc, sc 14, inc, sc, turn (20)
Row 11: sc, inc, sc 18, ch 3, turn (21)
Start rnd 12 in the 2nd ch from hook:
Row 12: sc 21, inc, sc, turn (24)
Row 13: sc, inc, sc 22, turn (25)
Row 14: sc 14, turn (14)
Row 15: sc2tog, sc 3, sc2tog, turn (5)
Row 16: sc2tog, sc, sc2tog, turn (3)
Row 17: sc2tog, sc, turn (2)
Row 18: sc2tog, sc 3 down the side of the rows, sc 11, turn (15)

Row 19: sc 3, turn (3)
Row 20: sc 3, turn (3)
Row 21: sc2tog, sc, turn (2)
Row 22: sc2tog, turn (1)
Row 23: sc, sc 3 down the side of the rows, sc 12, sc 3 down the side of the rows, sc 7, turn (26)

Row 24: sc 8, hdc, dc, dc3inc, dc, hdc, sc 9, hdc, dc 2, dc-inc (30)
FO, leaving a short tail to weave in later.
Outer Wings (Charizard ONLY)
Use Color A and crochet in rows. Make 2. Reference instructional photos in the ‘inner wings’ section above for rnds 18 and 23. *To make the edges look cleaner, I do not utilize turning ch’s.
Row 1: mr sc 2, turn (2)
Row 2: inc 2, turn (4)
Row 3: sc, inc 2, sc, turn (6)
Row 4: sc, inc, sc 2, inc, sc, turn (8)
Row 5: sc, inc, sc 4, inc, sc, turn (10)
Row 6: sc, inc, sc 6, inc, sc, turn (12)
Row 7: sc, inc, sc 8, inc, sc, turn (14)
Row 8: sc, inc, sc 10, inc, sc, turn (16)
Row 9: sc, inc, sc 12, inc, sc, turn (18)
Row 10: sc, inc, sc 14, inc, sc, turn (20)
Row 11: sc, inc, sc 18, ch 3, turn (21)
Start rnd 12 in the 2nd ch from hook:
Row 12: sc 21, inc, sc, turn (24)
Row 13: sc, inc, sc 22, turn (25)
Row 14: sc 14, turn (14)
Row 15: sc2tog, sc 3, sc2tog, turn (5)
Row 16: sc2tog, sc, sc2tog, turn (3)
Row 17: sc2tog, sc, turn (2)
Row 18: sc2tog, sc 3 down the side of the rows, sc 11, turn (15)
Row 19-20: sc 3, turn (3) 2 ROWS
Row 21: sc2tog, sc, turn (2)
Row 22: sc2tog, turn, (1)
Row 23: sc, sc 3 down the side of the rows, sc 12, sc 3 down the side of the rows, sc 7, turn (26)
Row 24: sc 8, hdc, dc, dc3inc, dc, hdc, sc 9, hdc, dc 2, dc-inc (30)
Sandwich the inner ear piece with the outer ear piece with about 15 in. of wire in-between. Keep in mind you will want a left and right wing, so flip the pieces as necessary to get one in each direction.

Now start making sc sts through both pieces, making sure to crochet overtop of the wire and tucking in any loose ends as you go. Make a hdc, dc, and another hdc in the bottom and top peak sts, and make 3 sc’s in the 2 inner corner sts (sc3inc). See the photos below for reference.


As you near the end, trim any excess wire if necessary. Make sure it’s all crocheted/tucked away into the the inside of the wings.
Mark your last sc st with a st marker and begin making slst’s around the wing in the FLO. When you make it back around to your st marker, FO and leave a short tail to weave in.

Charmeleon’s Tail
Start with Color B and crochet in continuous rounds.
Tip: You may want to make a wire skeleton for the tail - this isn’t required, but might be beneficial to help the tail point upwards.
Round 1: mr sc 4 (4)
Round 2: (sc, inc) x2 (6)
Round 3: sc around (6)
Round 4: (sc, inc) x3 (9)
Round 5: (sc, inc) x4, sc (13)
*In rnds 6-8, we will be color changing a lot. To make the pattern easier to read, the RED UNDERLINED TEXT will indicate which stitches should be made in Color B, and the YELLOW BOLD TEXT will indicate which stitches should be made in Color C.
Round 6: sc, sc 2, sc 2, sc 2, sc, sc 2, sc, sc 2 (13)
Round 7: sc, inc, sc 2, inc, sc, sc, inc, sc, sc, inc, sc, inc (18)
Round 8: sc 2, inc, sc 2, inc, sc 2, inc, sc 2, inc, (sc 2, inc) x2 (24)
CC to Color C, and only use Color C until specified otherwise.
Round 9-11: sc around (24) 3 ROUNDS
Round 12: (sc, dec) x8 (16)
Start stuffing the flame and continue stuffing as you go.
Round 13: dec 8 (8)
Round 14: dec 4 (4)
CC to Color A.
Round 15: (sc, inc) x2 (6)
Round 16: sc around (6)
Round 17: (sc, inc) x3 (9)
Round 18-19: sc around (9) 2 ROUNDS
Round 20: sc, inc, (sc 2, inc) x2, sc (12)
Round 21: sc around (12)
Round 22: (sc 3, inc) x3 (15)
Round 23: sc around (15)
Round 24: sc 2, inc, (sc 4, inc) x2, sc 2 (18)
Stuff the tail and continue stuffing as you go.
Round 25: (sc, dec) x3, (sc 2, inc) x3 (18)
Round 26: sc, inc, (sc 2, inc) x5, sc (24)
Round 27: (sc 2, dec) x2, sc 2, (sc 3, inc) x3, dec (24)
Round 28: sc around (24)
Round 29: (sc 3, inc) x6 (30)
Round 30: (sc 3, dec) x2, sc 3, inc, (sc 4, inc) x2, sc 4, dec (30)
Round 31: sc around (30)
Round 32: sc 2, inc, (sc 4, inc) x5, sc 2 (36)
Round 33: (sc 4, dec) x2, sc, (sc 5, inc) x3, sc 3, dec (36)
Round 34: sc around (36)
Round 35: (sc 5, inc) x6 (42)
Round 36: (sc 5, dec) x2, sc 4, inc, (sc 6, inc) x2, sc 7, dec (42)
Round 37: sc around (42)
Round 38: sc 3, inc, (sc 6, inc) x5, sc 3 (48)
Make a slst and FO, leaving a long tail to sew with later.

Charizard’s Tail
Start with Color B and crochet in continuous rounds.
Tip: You may want to make a wire skeleton for the tail - this isn’t required, but might be beneficial to help the tail point upwards.
Round 1: mr sc 4 (4)
Round 2: (sc, inc) x2 (6)
Round 3: sc around (6)
Round 4: (sc, inc) x3 (9)
Round 5: (sc, inc) x4, sc (13)
Round 6: sc around (13)
Round 7: sc, inc, (sc 2, inc) x3, sc, inc (18)
Round 8: (sc 2, inc) x6 (24)
Round 9: sc around (24)
*In rnds 11-14, we will be color changing a lot. To make the pattern easier to read, the RED UNDERLINED TEXT will indicate which stitches should be made in Color B, and the YELLOW BOLD TEXT will indicate which stitches should be made in Color C.
Round 10: sc 3, inc, sc, sc 2, inc, sc 3, inc, sc 2, sc, inc, sc 3, inc, sc, sc 2, inc (30)
Round 11: sc 2, sc, sc 2, sc, sc, sc, sc 5, sc, sc 7, sc 2, sc 2, sc 2, sc 3 (30)
Round 12: sc 2, inc, sc 3, sc, inc, sc 4, inc, sc 4, inc, sc 3, sc, inc, sc 3, sc, inc, sc 2 (36)
Round 13: sc 3, sc 2, sc 2, sc 3, sc 4, sc, sc 2, sc, sc 2, sc 3, sc 3, sc, sc 2, sc, sc 2, sc 2, sc 2 (36)
Round 14: sc, sc 4, sc, sc 3, sc 2, sc 3, sc 2, sc 5, sc, sc 3, sc, sc 6, sc, sc 2, sc (36)
CC to Color C, and only use Color C until specified otherwise.
Round 15: sc 2, dec, (sc 4, dec) x5, sc 2 (30)
Round 16: (sc 3, dec) x24)
Round 17: sc, dec, (sc 2, dec) x5, sc (18)
Start stuffing the flame and continue stuffing as you go.
Round 18: (sc, dec) x6 (12)
Round 19: dec 6 (6)
CC to Color A.
Round 20: sc around (6)
Round 21: (sc, inc) x3 (9)
Round 22-25: sc around (9) 4 ROUNDS
Round 26: sc, inc, (sc 2, inc) x5, sc (12)
Round 27-29: sc around (12) 3 ROUNDS
Stuff the tail and continue stuffing as you go.
Round 30: (sc 3, inc) x3 (15)
Round 31-32: sc around (15) 2 ROUNDS
Round 33: sc 2, inc, (sc 4, inc) x2, sc 2 (18)
Round 34: (sc, dec) x3, (sc 2, inc) x3 (18)
Round 35: sc, inc, (sc 2, inc) x5, sc (24)
Round 36: (sc 2, dec) x2, sc 2, (sc 3, inc) x3, dec (24)
Round 37: sc around (24)
Round 38: (sc 3, inc) x6 (30)
Round 39: (sc 3, dec) x2, sc 3, inc, (sc 4, inc) x2, sc 4, dec (30)
Round 40: sc around (30)
Round 41: sc 2, inc, (sc 4, inc) x5, sc 2 (36)
Round 42: (sc 4, dec) x2, sc, (sc 5, inc) x3, sc 3, dec (36)
Round 43: sc around (36)
Round 44: (sc 5, inc) x6 (42)
Round 45: (sc 5, dec) x2, sc 4, inc, (sc 6, inc) x2, sc 7, dec (42)
Round 46: sc around (42)
Round 47: sc 3, inc, (sc 6, inc) x5, sc 3 (48)
Round 48: sc 3, dec, sc 6, dec, sc 4, (sc 7, inc) x3, sc 2, dec, sc 3 (48)
Round 49: sc around (48)
Round 50: (sc 7, inc) x6 (54)
Round 51: (sc 7, dec) x2, sc 5, inc, (sc 8, inc) x2, sc 10, dec (54)
Round 52: sc around (54)
Make a slst and FO, leaving a long tail to sew with later.

Charmeleon’s Belly
Use Color D and crochet in rows. *To make the edges look cleaner, I do not utilize turning ch’s.
Row 1: mr sc 2, turn (2)
Row 2-3: sc across, turn (2) 2 ROWS
Row 4: inc 2, turn (4)
Row 5-7: sc across, turn (4) 3 ROWS
Row 8: sc, inc 2, sc, turn (6)
Row 9-12: sc across, turn (6) 4 ROWS
Row 13: sc, inc, sc 2, inc, sc, turn (8)
Row 14-16: sc across, turn (8) 3 ROWS
Row 17: sc, inc, sc 4, inc, sc, turn (10)
Row 18-19: sc across, turn (10) 2 ROWS
Row 20: sc, inc, sc 6, inc, sc, turn (12)
Row 21-22: sc across, turn (12) 2 ROWS
Row 23: sc, inc, sc 8, inc, sc, turn (14)
Row 24-30: sc across, turn (14) 7 ROWS
Row 31: sc, inc, sc 10, inc, sc, turn (16)
Row 32: sc across, turn (16)
Row 33: sc, inc, sc 12, inc, sc, turn (18)
Row 34-55: sc across, turn (18) 22 ROWS
Row 56: sc2tog, sc 16, turn (17)
Row 57: sc2tog, sc 15, turn (16)
Row 58: sc2tog, sc 14, turn (15)
Row 59: sc2tog, sc 13, turn (14)
Row 60: sc2tog, sc 12, turn (13)
Row 61: sc2tog, sc 11, turn (12)
Row 62: sc2tog, sc 10, turn (11)
Row 63: sc2tog, sc 9, turn (10)
Row 64-65: sc across, turn (10) 2 ROWS
Row 66: sc2tog, sc 8, turn (9)
Row 67: sc2tog, sc 7 (8)
Slst around the entire belly piece until you make your way back to the last sc you made in row 67. Make these slst’s LOOSE or else your belly will curl too much. FO leaving a short tail and weave it into the back-side of the belly. We will not use this yarn tail for sewing.
Charizard’s Belly
Use Color D and crochet in rows. *To make the edges look cleaner, I do not utilize turning ch’s.
Row 1: mr sc 2, turn (2)
Row 2-5: sc across, turn (2) 4 ROWS
Row 6: inc 2, turn (4)
Row 7-12: sc across, turn (4) 6 ROWS
Row 13: sc, inc 2, sc, turn (6)
Row 14-19: sc across, turn (6) 6 ROWS
Row 20: sc, inc, sc 2, inc, sc, turn (8)
Row 21: sc across, turn (8)
Row 22: sc, inc, sc 4, inc, sc, turn (10)
Row 23-24: sc across, turn (10) 2 ROWS
Row 25: sc, inc, sc 6, inc, sc, turn (12)
Row 26-31: sc across, turn (12) 6 ROWS
Row 32: sc, inc, sc 8, inc, sc, turn (14)
Row 33-35: sc across, turn (14) 3 ROWS
Row 36: sc, inc, sc 10, inc, sc, turn (16)
Row 37-38: sc across, turn (16) 2 ROWS
Row 39: sc, inc, sc 12, inc, sc, turn (18)
Row 40-47: sc across, turn (18) 8 ROWS
Row 48: sc, inc, sc 14, inc, sc, turn (20)
Row 49-50: sc across, turn (20) 2 ROWS
Row 51: sc, inc, sc 16, inc, sc, turn(22)
Row 52-58: sc across, turn (22) 7 ROWS
Row 59: sc2tog, sc 20, turn (21)
Row 60: sc2tog, sc 19, turn (20)
Row 61-62: sc across, turn (20) 2 ROWS
Row 63: sc2tog, sc 18, turn (19)
Row 64: sc2tog, sc 17, turn (18)
Row 65-67: sc across, turn (18) 3 ROWS
Row 68: sc2tog, sc 16, turn (17)
Row 69: sc2tog, sc 15, turn (16)
Row 70: sc across, trun (16)
Row 71: sc2tog, sc 14, turn (15)
Row 72: sc2tog, sc 13, turn (14)
Row 73: sc2tog, sc 12, turn (13)
Row 74: sc2tog, sc 11, turn (12)
Row 75: sc2tog, sc 10, turn (11)
Row 76: sc2tog, sc 9, turn (10)
Row 77: sc2tog, sc 8, turn (9)
Row 78: sc2tog, sc 7 (8)
Slst around the entire belly piece until you make your way back to the last sc you made in row 78. Make these slst’s LOOSE or else your belly will curl too much. FO leaving a short tail and weave it into the back-side of the belly. We will not use this yarn tail for sewing.
Assembly
1. Cut out and embroider your felt eyes with white, black, and blue felt. Using matching embroidery thread and an embroidery needle, sew the eye pieces together. I make my eyes 50mm by 50mm for reference. (The colors in the photo do not match the instructions because I was making Shiny Charizard!)
Or you can skip step 1 if you purchase pre-cut felt eye kits HERE.

2. Shape the face using the step-by-step instructions below:


3. Using sewing pins, pin down your felt eyes overtop of the eye sockets that we created in the previous step. Then, use white, black, and blue embroidery floss and an embroidery needle to sew them onto the head.

4. Using sewing pins, pin down the eyelids overtop of the felt eyes. You’ll want the foundation ch side of the eyelids to be on the bottom and row 1 to be on the top. Then, use the excess yarn tails from the eyelids to sew ONLY row 1 above the eyes. No need to sew down the foundation ch ~ it should lay overtop of the felt eye.

5. Sew the horn(s) on top of the head:
For Charmeleon, use the leftover yarn tail to sew the [one] horn over rnds 27-31, ensuring it’s evenly spaced with the eyes. Make sure to stuff the horn a little bit before completely sewing it on.

For Charizard, use the leftover yarn tails to sew the [two] horns over rnds 24-30, ensuring they’re evenly spaced with the eyes. Make sure to stuff the horns a little bit before completely sewing them on.

6. Sew the tail onto the back of the body (the side where the lower back protrudes outwards):
For Charmeleon, use the leftover yarn tail to sew the tail from rnds 6-22. Make sure to stuff the tail a little bit more before completely sewing it on.

For Charizard, use the leftover yarn tail to sew the tail from rnds 6-26. Make sure to stuff the tail a little bit more before completely sewing it on.

7. Use sewing pins to pin the belly piece onto Charmeleon/Charizard. Once it’s placed how you like it, sew it onto the body using a yarn needle and worsted weight in Color A. To sew this piece on seamlessly, sew the back bumps of the outer sc’s onto the body. This leaves the outer sc sts visible and neat! I like to start at the bottom of the tail and work my way up towards the neck. Make sure to tuck in any loose ends along the way.

8. Place the head onto the body to get an idea of how you’d like it to look. Once you figure out placement, sew the head onto the body using your yarn needle and the leftover yarn tail from the body.
9. Sew the thighs onto the body:
For Charmeleon, pin the thighs in place on the sides of the body to get an idea of where you’d like to sew them. Once you’ve done that, you can go ahead and use a yarn needle and the leftover yarn tails to sew them onto the body. Make sure to stuff the thighs prior to completely sewing them on.

For Charizard, play around with the placement of the thighs to get them in a position you like. I personally like to use the feet to help me figure out if I like the placement as a reference. It might be beneficial to use something like amistix, upholstery needles, or knitting needles to pin the thighs in place once you figure out their ideal position. You may also use sewing pins to pin them in place, but it may be a little less sturdy as you sew!
Once the thighs are pinned or secured in the way you like, you can use worsted weight in Color A and a yarn needle to sew them onto the sides of the body.

10. Sew the feet onto the thighs using your yarn needle and the leftover yarn tails from the feet. You can stuff the feet a little bit before completely sewing them on if necessary.

11. Sew the arms onto the body using your yarn needle and the leftover yarn tails from the arms. Sew them at a slight angle from rnds 26-34 for Charmeleon or rnds 32-39 for Charizard.

12. (Charizard ONLY) Find and mark the 7 sts on the flat side of the wings. You can see I have them marked with st markers in the photo below. These are the sts we will sew onto the back of the body for each wing ~ sew them from rnds 30-35.


* CONGRATS *
You're Finished!
* CONGRATS * You're Finished!
I hope you enjoyed crocheting Charmeleon and Charizard with me! If you have any questions, feel free to email me at crochetbykittengrll@yahoo.com. I am more than happy to help!
I would love to see your finished creations! Feel free to tag me in your posts so I can see (@crochetbykittengrll on TikTok/Insta/YouTube/Pinterest)! Or follow me to keep up with any future patterns!
The best way to support me, and allow me to release more free patterns is to follow me on my socials and if you recreate this design, to tag me!


